Human Scanning
Non-rigid Fitting Algorithm
The scanned person is hard to keep still for a long time during scanning, such as breathing and blinking, but the algorithm will judge and correct the wrong postures based on the slight movement of the body to avoid scan errors.
Scanning Setting
When scanning the human, please select the “human being scanning” mode, and keep an eye on whether the Hair Enhancement is turned on. You can select different resolutions next to the
Finishicon in advance. The default and recommended resolution is 0.7mm.
When the resolution is 1.0mm, the scanning details are relatively rough, which is suitable for users with low requirements for details. And this resolution is also very suitable for beginners, because it is easier to get started.
When the resolution is 0.2mm, the scanning details are fine, which is suitable for users with high requirements for details. Please note that the data at this resolution will be large. The point cloud will be 30 million or more, generally a computer cannot scan a person completely at 0.2mm. So 0.2mm is only suitable for scanning half of the body, face, hands and other relatively small parts.
Hari Requirements
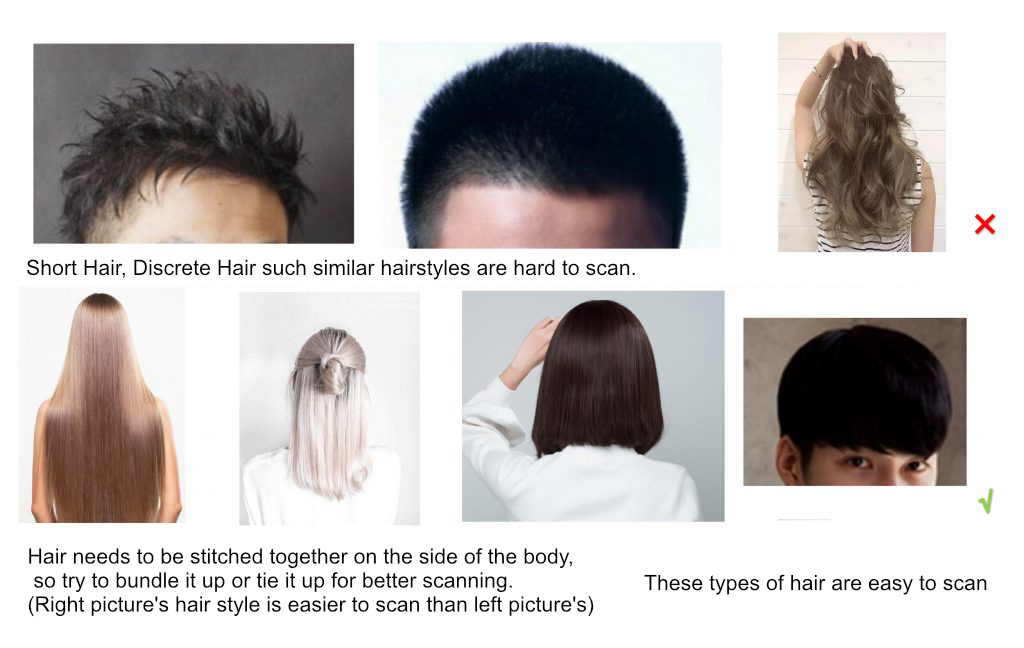
You can apply dry cleaning shampoo or colored spray on your hair, or wet your hair with water to put your hair up, which will help to scan.
Observe the following hairstyles to check which one is suitable for 3D scanning.

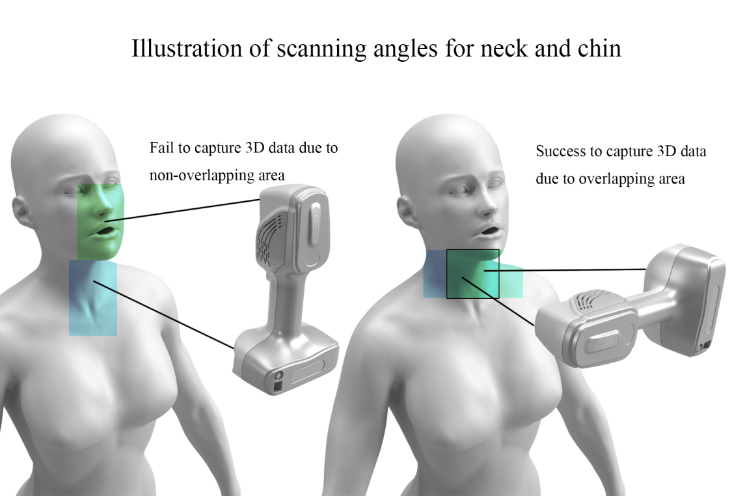
Dead Angle Scanning
The chin belongs to the dead angle, which can be scanned by the following methods.

Scanning Posture
Scanned-Human Requirements
If the scanned person wants to open his eyes to scan, his eyes must focus on one place, and the eye movement will also drive his body to rotate.
Finger holding together is better than finger splaying for scanning. If finger splaying, on the one hand, the finger is easy to shake, leading to wrong splicing; on the other hand, it is difficult to scan the finger seam completely. You have to change various angles to slowly fill that seam, which will cost a longer time, while the model may not be able to persist.
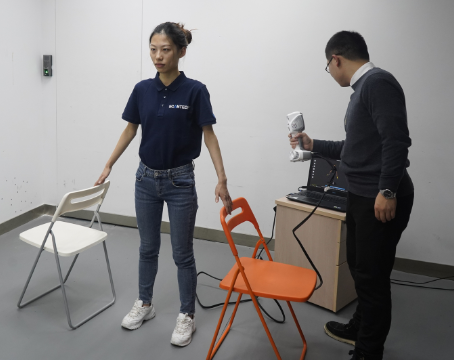
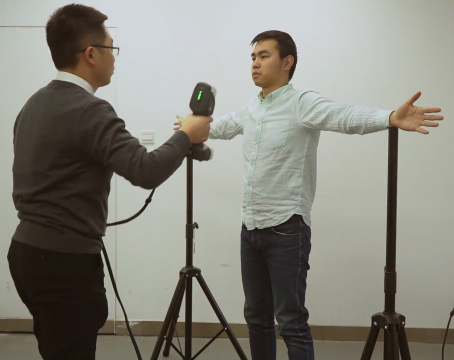
Assistive devices can be used for special postures, such as A-Pose and T-Pose, to fix the human body so that the body won’t change or deform during scanning.
Scanning-Human Requirements
Before scanning, tell the person being scanned not to move as much as possible and look straight ahead.
When scanning, if the scanning amplitude is large, it is easier to cause stacking/splicing failure and more noise.
It is better for people around to keep quiet because your conversation will easily cause mood fluctuation of the person being scanned, which will obviously increase the body undulation.
When scanning the arms, it is much easier to scan with the arm close to the body than the posture of hands on hips because the latter needs to scan the inside of the arm, increasing the scanning difficulty and time.
When scanning the arm/leg in a specific shape, it is difficult to maintain that posture, so you need to complete the scanning at one time, and then not scan again.
Scanning Distance
When scanning the face, the scanning distance should be around 400mm, because of good quality at a short distance.
When scanning the head, it is better to control the distance between 500-700mm, because we need the features near the head to splice. Standing on a chair to scan the hair is a way if it is hard to scan the top of the person being scanned with a standing posture. Should keep careful!
If the requirements for other parts are not high, 450-600mm is the best distance or you can also get a little bit further.
Object not suitable for scanning
Not to scan objects that are easy to deform: such as skirts, tulle, and other objects that are easy to float.
It’s difficult to scan reflective, mirrored, and light-transmitting items e.g. glasses, watches, jewelry, decorations, and black and bright leather shoes that should be taken off before scanning.
Articles that are thin/small/sharp/long and easy to float with breath/shake should be taken off or covered before scanning. It is troublesome to repair the drawings in the later stage.
Scanning Order
The scanning path needs to form a closed loop to increase the accuracy of feature stitching. The whole process should be smooth and fast so that the scanning effect is better. For parts that are easy to change, try to finish scanning at one time, better not to rescan. For example, you can scan the head first, then scan other parts, and then do not scan the head again in subsequent scanning, because the head may be displaced from the body, and the scanning may be overlapped again.
Recommended scan path for full-body portrait: Start → chest → front face → ear → side face → forehead and bangs → chin → abdomen → left front leg → abdomen → right front leg → abdomen → right front arm → right side arm → left front arm → left side arm → left back arm → right back arm → right back leg → left back leg → back of the head → top of the head → end.

