Scanning Mode
Choose a suitable scan mode based on Scanning Objects before starting to scanning. If you don’t make a choice, the Colorful Object Scanning Mode is the default.
Click the icon of “+” in the Setting interface or the tool of mode selection to create Custom Mode.
Let’s have a brief understanding of the 3 defaulted scan modes.
The Default Mode
Mode |
Icon |
Performance |
|---|---|---|
Colorful Object Scanning Mode |
|
Colorful obj. file The flashing light is turned on There will be no extension edge in closing small holes Accurate algorithm |
Human Body Scanning Mode |
|
Colorful obj. file The flashing light is turned on Default: Close small holes with extension edge Default on Hair Enhancement |
LED Off Mode |
|
Object with no color The flashing light is turned off Accurate algorithm |
The three default modes have something in common: Feature Splicing mode, scanning distance of 200mm-1000mm, resolution of 0.7mm
Custom Mode
In actual work, the custom mode may be the most used mode. How to add a custom mode?
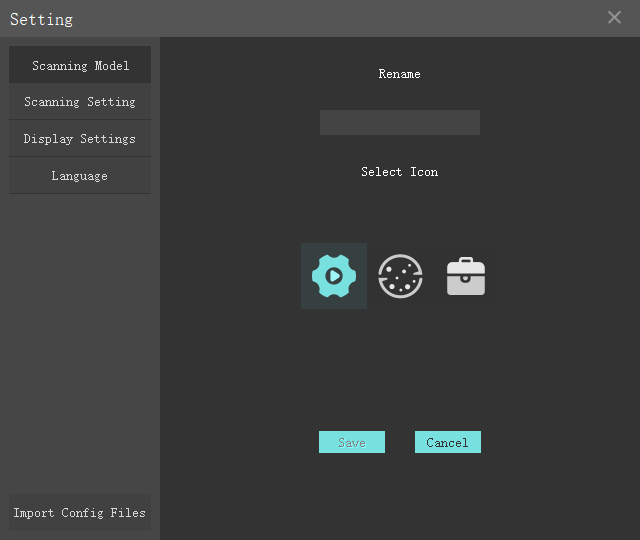
Figure 2
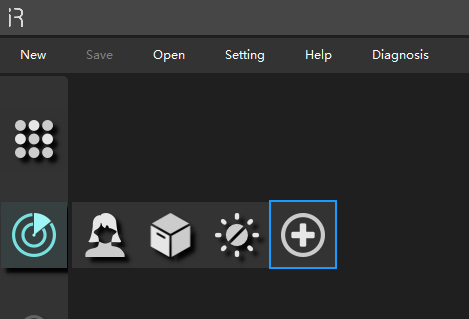
Figure 1
Open the setting menu and click the plus sign, or click the plus sign directly (right figure);
Set the Working parameters needed
Name the mode (see figure 2)
Choose one icon
Click Save
The commonly added custom modes are:
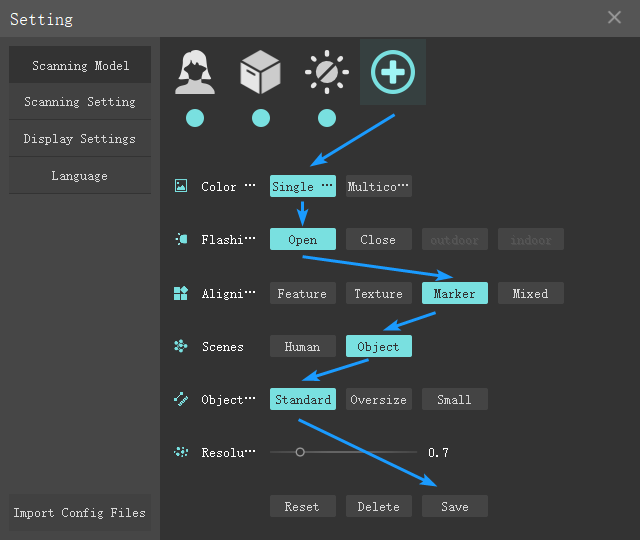
The mode of Marker Splicing
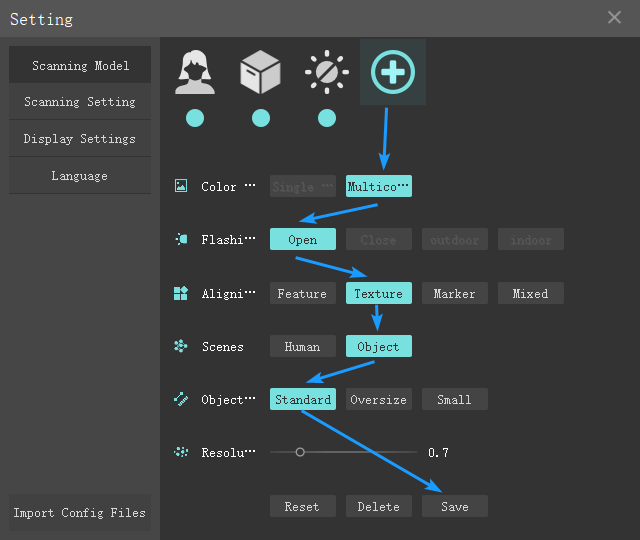
The mode of Texture Splicing
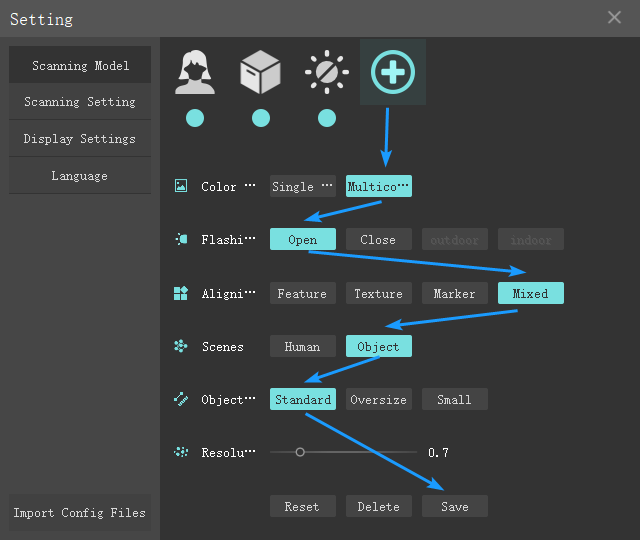
The mode of Mixed Splicing
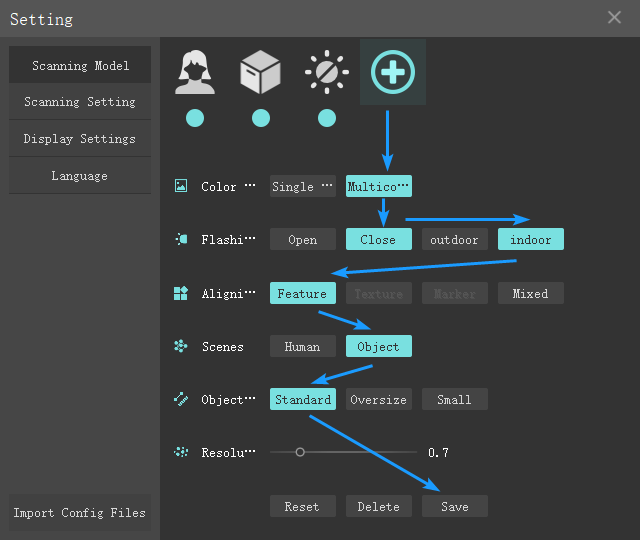
The mode of LED off and with textures
Working parameters
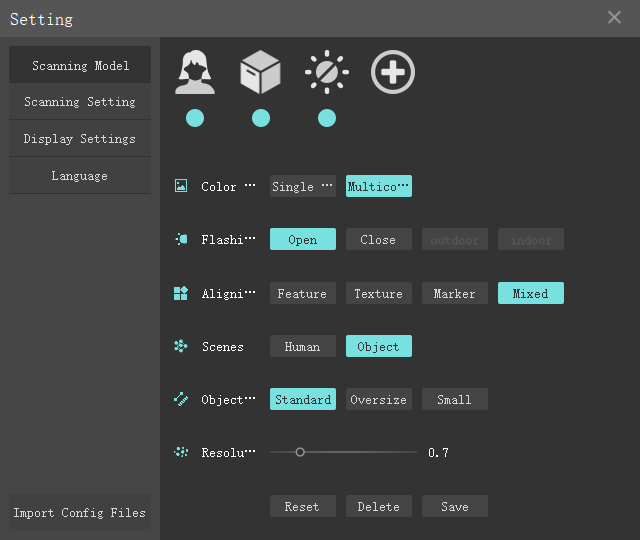
Name |
Icon |
Indication |
|---|---|---|
Light Source |
|
Infrared Light Source |
Color |
|
Whether the scanned model has color, that is, whether the color camera works. If the single color is selected, the model has no color. |
Flashing Light |
|
If the fill light is turned on, the pictures taken by the color camera are bright, but the fill light is too dazzling. If the fill light is turned off, the color will be dark, which is suitable for situations where the requirements for texture quality are not high. |
Alignment Methods |
|
See the next chapter for the working principle of scanner connection. |
Scene |
|
Different algorithms are used in different scenes. Non-rigid fitting algorithm: the scanned person is hard to keep still for a long time during scanning, such as breathing and blinking, but the algorithm will judge and correct the wrong postures based on the slight movement of the body to avoid scan errors. Accurate algorithm: object splicing is a normal algorithm, which just simply finds matching features for splicing. |
Size |
|
Select the right parameters based on the objects’ size Standard: Suitable for 50cm-200cm objects Oversize: Suitable for more than 200cm objects Small: Suitable for 20cm-50cm objects |
Resolution |
|
The default resolution is different for various object sizes |
Hint
After scanning, the resolution can be modified. The modified model will have an impact on the effect. Click the Data Quality Color Map to see the specific impact.
Hide on homepage

The blue dot below each icon can be clicked to hide or display the mode icon on the homepage.


